Install Magento 2.4.6 on Ubuntu 22.04 [Complete Guide]
Table of Contents
Introducing Magento 2 is never a simple errand. Since the absolute first delivery, there are numerous issues clients may experience when introducing Magento 2.
With the most recent arrival of Magento 2.4.6, things have gotten more earnestly as Magento 2 currently, requires Elasticsearch as a compulsory part.
To make a Magento 2 establishment work appropriately in the Production climate, clients are prescribed to introduce Magento 2 in localhost first. At that point move the neighborhood establishment to a Magento 2 facilitating and update store’s Baseurl, and reindex Magento 2.
In this instructional exercise, we will experience the way toward introducing Magento 2 (with Elasticsearch) in Ubuntu.
If you are also want to install Magento2 on Windows. Click Here.
Contents-
- Step 1: Install Apache2
- Step 2: Install MySQL and Create Database for Magento2
- Step 3: Install PHP and required extensions
- Step 4: Install and configure Elasticsearch
- Step 5: Install Composer
- Step 6: Download and Install Magento2
- Wrapping up
Before starting the installation, you can check the system requirement for installing Magento2 here.
Step 1: Install Apache2
First, we will install Apache web server. Connect to your server using ssh protocol with root access and run this command:
Apache is available in Ubuntu’s default software repositories. For this reason, we’ll start by updating the local package index for the latest changes.
sudo apt update
Then, lets install the apache2 package.
sudo apt install apache2
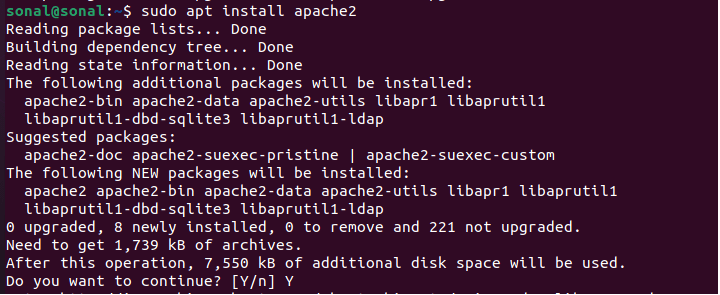
The system will ask to continue yes/no. Input “y” then enter to proceed.
Once installed, you can check the installed Apache version with the following command:
sudo apache2ctl -v
To verify if apache2 was install properly, in your browser, enter your domain or ip address or 127.0.0.1. If the result is apache default page => everything is fine

To enable auto startup for apache, use this command:
systemctl is-enabled apache2
Step 2: Install MySQL and Create Database for Magento2
Install MySQL using apt command:
sudo apt install mysql-server

When prompted, typing Y to confirm installation and then press ENTER.
When the installation is complete, lets check the mysql version

Configure Password Access for the MySQL Root Account
Login with root user.
sudo mysql
SELECT user,authentication_string,plugin,host FROM mysql.user;
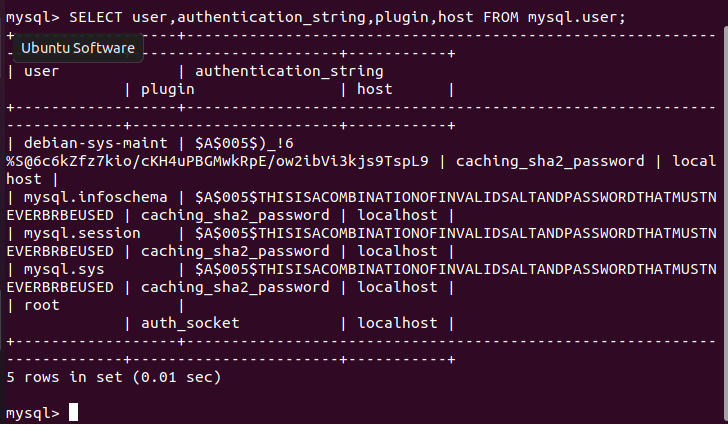
Note: Replace ‘your_secure_password‘ with your password. |
ALTER USER 'root'@'localhost' IDENTIFIED WITH mysql_native_password BY 'your_secure_password';
exitCreate new MySQL user for Magento 2
Login with root user.
mysql -u root -p
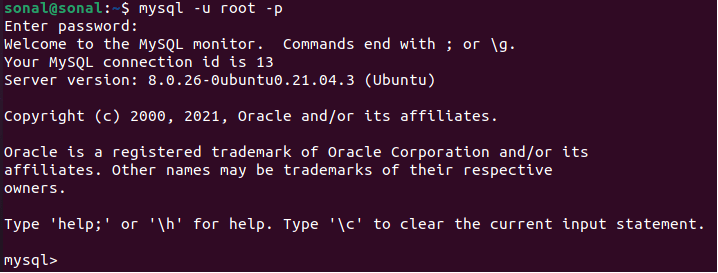
SELECT user,authentication_string,plugin,host FROM mysql.user;
Note: Replace ‘your_secure_password‘ with your password. |
CREATE USER 'magento2'@'localhost' IDENTIFIED BY 'your_secure_password';
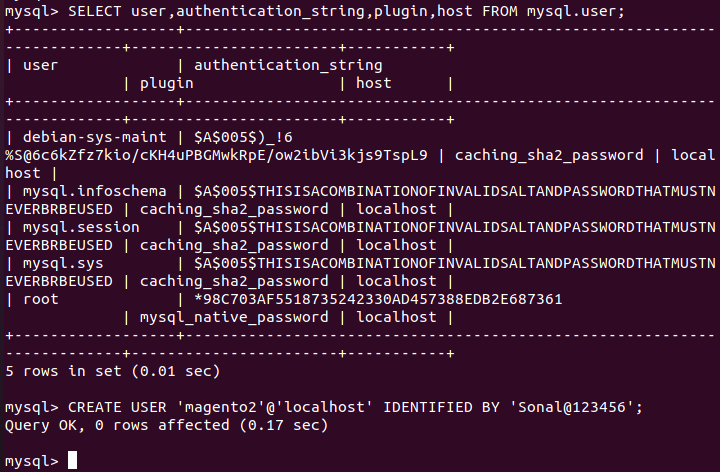
ALTER USER 'magento2'@'localhost' IDENTIFIED WITH mysql_native_password BY 'your_secure_password';

Grant all privileges to magento2 users.
GRANT ALL PRIVILEGES ON *.* TO 'magento2'@'localhost' WITH GRANT OPTION;

exitCreate Magento 2 database
Lets create the database for our magento2: –
mysql -u magento2 -p
Then create
CREATE DATABASE magento2;
exit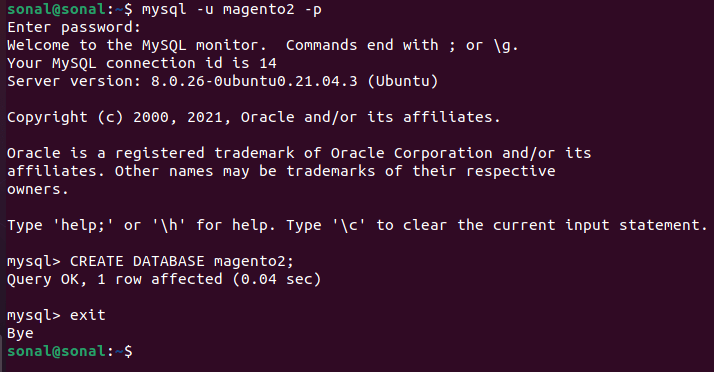
Step 3: Install PHP and required extensions
In this step, we will install PHP. Magento 2.4 require PHP 7.4, so we will install php 7.4 in this tutorial.
Update your APT repositories.
sudo apt update
Install PHP 8.1 and packages with command:
sudo apt install php8.1 libapache2-mod-php php-mysql
Next, verify your PHP version:
php -v
sudo nano /etc/apache2/mods-enabled/dir.conf
Modify the index.php file order to the top listed in the DirectoryIndex.
The dir.conf file after modifying will look like this:

Install and enable mbstring extension.
sudo apt install php8.1-mbstring
sudo phpenmod mbstring
Enable the Apache rewrite module.
sudo a2enmod rewrite

Install PHP modules for Magento 2.4.x.
sudo apt install php8.1-bcmath php8.1-intl php8.1-soap php8.1-zip php8.1-gd php8.1-curl php8.1-cli php8.1-xml php8.1-xmlrpc php8.1-gmp php8.1-common
Reload Apache for the changes to take effect.
sudo systemctl reload apache2
Configure php settings
php -i | grep "Configuration File"
From this command, you will get path to the php.ini file. Open this file to modify some settings:
sudo nano <path_of_php.ini_file>
In php.ini file, search and change the following values as below
max_execution_time=18000
max_input_time=1800
memory_limit=4G
Save the file. Reload Apache2.
sudo systemctl reload apache2
These values will keep the installation go properly without interruption.
Step 4: Install and configure Elasticsearch
From Magento 2.4, Elasticsearch has become compulsory component. From Magento 2.4, catalog search will no longer use mysql, instead the system will use Elasticsearch by default.
So let’s install and configure it.
Install Elasticsearch
First, we will install Openjdk17 (Java) as Elasticsearch runs on Java:
sudo apt install openjdk-17-jdk
Next, verify if the java was installed properly and check its version with this syntax
java -version
The first step is to import the GPG key for Elasticsearch packages using the following command:
sudo apt install curl
 Once done, run below command:-
sudo curl -sSfL https://artifacts.elastic.co/GPG-KEY-elasticsearch | sudo gpg --no-default-keyring --keyring=gnupg-ring:/etc/apt/trusted.gpg.d/magento.gpg --import
Then you need to add Elasticsearch repository to the system using the following command:
sudo sh -c 'echo "deb https://artifacts.elastic.co/packages/7.x/apt stable main" > /etc/apt/sources.list.d/elastic-7.x.list'sudo chmod 666 /etc/apt/trusted.gpg.d/magento.gpgAfter completing the above steps, you must first update the cache using the following commands. Then install Elasticsearch packages on the system:
sudo apt updatesudo apt install elasticsearch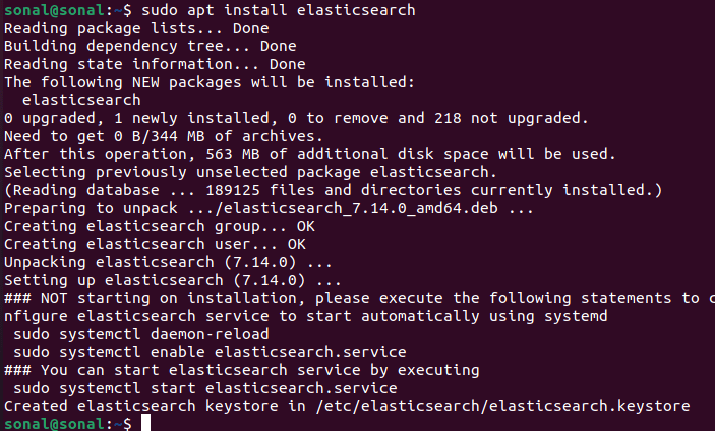
Finally, you can use the following commands Start and enable the Elasticsearch service:
sudo systemctl daemon-reloadsudo systemctl enable elasticsearch.servicesudo systemctl start elasticsearch.serviceConfigure Elasticsearch
Once the elasticsearch has been installed on your system, open the elasticsearch.yml configuration file.
Now that you have installed Elasticsearch and its Java dependency, it is time to configure Elasticsearch.
The Elasticsearch configuration files are in the /etc/elasticsearch directory. The ones we’ll review and edit are:
elasticsearch.yml— Configures the Elasticsearch server settings. This is where most options are stored, which is why we are mostly interested in this file.jvm.options— Provides configuration for the JVM such as memory settings.
The first variables to customize on any Elasticsearch server are node.name and cluster.name in elasticsearch.yml. Let’s do that now.
As their names suggest, node.name specifies the name of the server (node) and the cluster to which the latter is associated. If you don’t customize these variables, a node.name will be assigned automatically in respect to the server hostname. The cluster.name will be automatically set to the name of the default cluster.
The cluster.name value is used by the auto-discovery feature of Elasticsearch to automatically discover and associate Elasticsearch nodes to a cluster. Thus, if you don’t change the default value, you might have unwanted nodes, found on the same network, in your cluster.
Let’s start editing the main elasticsearch.yml configuration file. Open it using nano or your preferred text editor:
sudo nano /etc/elasticsearch/elasticsearch.ymlRemove the # character at the beginning of the lines for node.name and cluster.name to uncomment them, and then change their values. Your first configuration changes in the /etc/elasticsearch/elasticsearch.yml file will look like this:
...
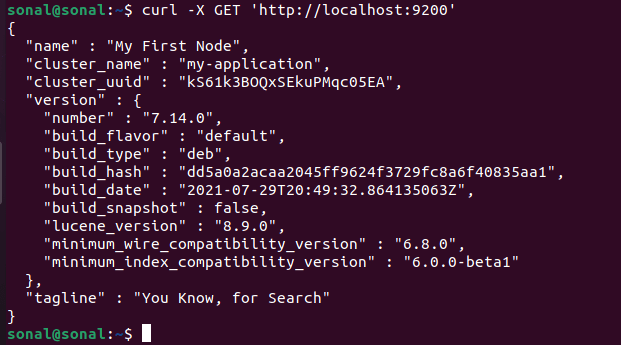
Now we have finished installing Elasticsearch.
Now let’s install next component – Composer.
Step 5: Install Composer
In this tutorial, we will install Magento 2.4 using composer. First, run this command to download composer installer.
Move back to the root directory.
cd ~
curl -sS https://getcomposer.org/installer -o composer-setup.phpsudo php composer-setup.php --install-dir=/usr/bin --filename=composerLet’s check the composer version.
composer
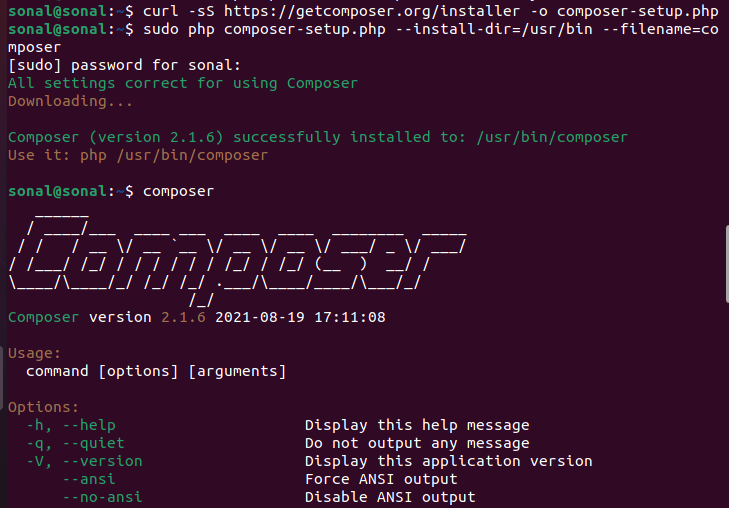
Our composer version is 2.1.6. Now we are ready to download Magento 2.4 using composer.
Step 6: Download and Install Magento2
Download Magento2:-
Go to html folder by command:
cd /var/www/html
Create a new Composer project using the Magento Open Source or Magento Commerce metapackage.
Command for this is :-
sudo composer create-project --repository-url=https://repo.magento.com/ magento/project-community-edition=2.4.5 magento2
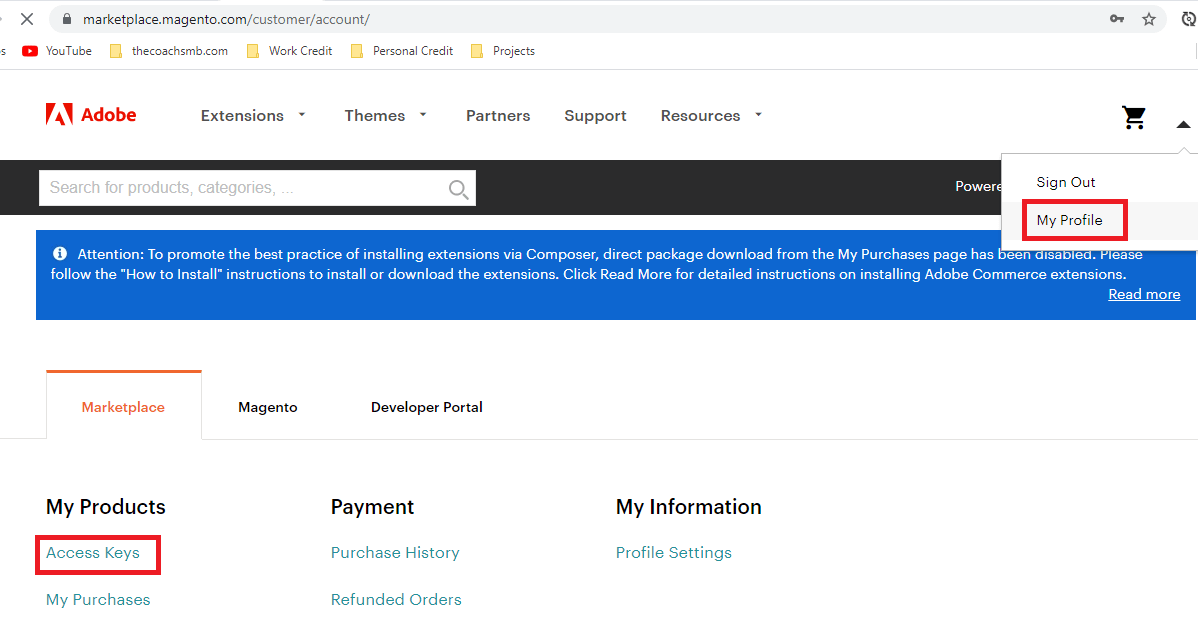
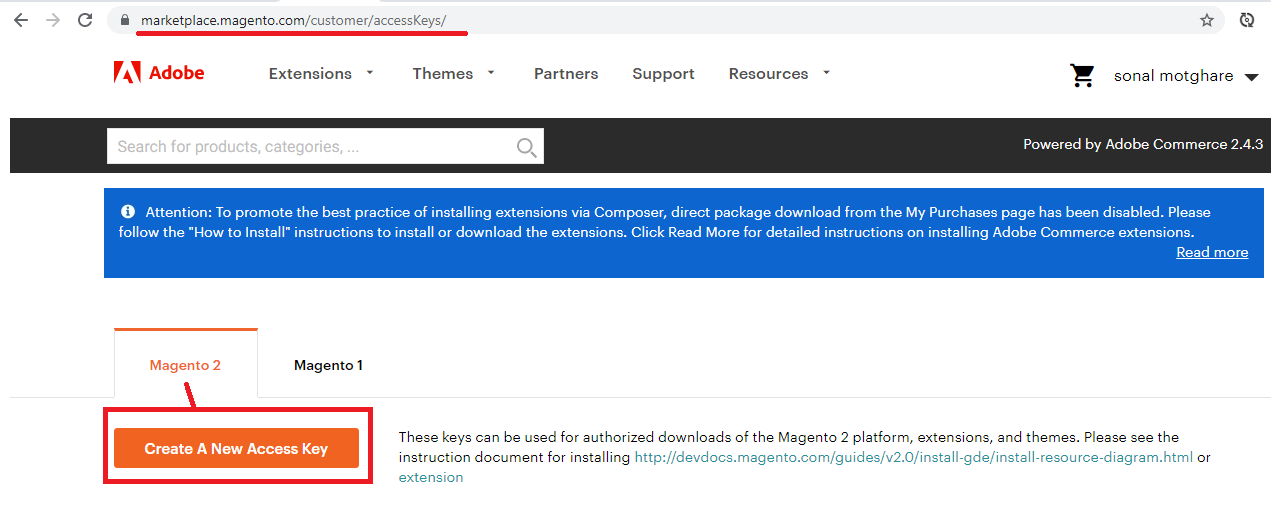
Create Access keys here. If you have access keys, you can use those.
Now enter Username and password to start downloading
- Username: Your public Key 2fc966a913d4e83b28041eeb3c3b72e5
- Password: Your private key. 48e05400d17ca1bcb4e693825c45416e
You will see this screen if everything is fine. Now just wait some minutes, composer is download Magento 2 to your server
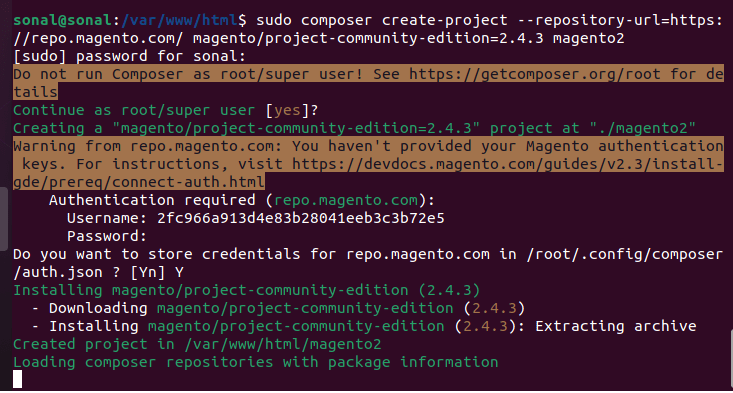
Wait the process to complete.
Set file permissions
cd /var/www/html/<magento install directory>
sudo find var generated vendor pub/static pub/media app/etc -type f -exec chmod g+w {} +
sudo find var generated vendor pub/static pub/media app/etc -type d -exec chmod g+ws {} +
sudo chown -R user_name:www-data .
sudo chmod u+x bin/magento
sudo chown -R user_name:www-data . => user_name is the user with root accessInstall Magento 2
Everything is ready, now we will run the final command to install Magento 2.4
First, change the current directory to your website folder (this is also where you downloaded Magento 2 data in step 3)
Go to Magento 2 install directory.
cd /var/www/html/<magento install directory>
You must use the command line to install Magento.
php bin/magento setup:install --base-url=<your-domain> --db-host=localhost --db-name=magento2 --db-user=magento2 --db-password=<your-db-password-of-magento2-user> --admin-firstname=Admin --admin-lastname=Admin --admin-email=admin@admin.com --admin-user=admin --admin-password=<your-admin-password> --language=en_US --currency=USD --timezone=America/Chicago --backend-frontname=admin --search-engine=elasticsearch7 --elasticsearch-host=localhost --elasticsearch-port=9200Replace the following information with your information
--base-url : your domain, eg: sonal.magento.com. You can change this base URL later if you make mistake.
--db-host : Database host, input localhost if you follow my tutorial
--db-name : name of the database we created in step 2
--db-user : name of the database user we created in step 2
--db-password : password of your mysql user
Now composer will start installing Magento 2.4. The process will take a while (approximately 20 minutes)

Wait until the installation is successful.
When everything is done you will see this
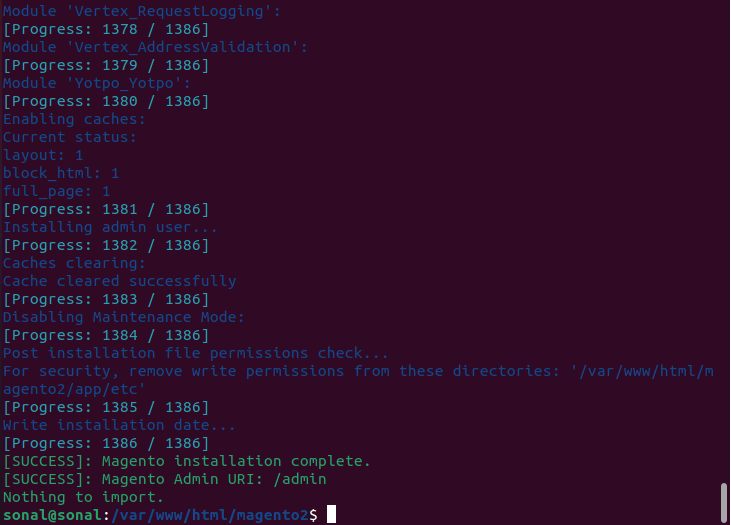
Congratulation, Magento 2.4 was successfully installed to your ubuntu server.
Change DocumentRoot To Pub
If you append a directory name to your server’s hostname or IP address to create the base URL when you installed Magento (for example http://<your-ip>/magento2 or http://<your-sever-hostname>/magento2), you’ll need to remove it.
Edit your virtual host file
sudo nano /etc/apache2/sites-available/sonal.magento.com.conf
Add the path to your Magento pub/ directory to the DocumentRoot directive:
Modify file as shown below:
<VirtualHost *:80>ServerAdmin webmaster@localhostDocumentRoot /var/www/html/magento2/pub ServerName sonal.magento.comErrorLog ${APACHE_LOG_DIR}/error.logCustomLog ${APACHE_LOG_DIR}/access.log combined<Directory "/var/www/html">AllowOverride all</Directory></VirtualHost>Restart Apache for the changes to take effect:
sudo systemctl restart apache2
If you are installing Magento locally, you can add domain.com. Then you have to update hosts file at /etc/hosts with
127.0.0.1 sonal.magento.com127.0.0.1 sonal.magento.com
sudo a2ensite sonal.magento.com.confphp bin/magento indexer:reindex && php bin/magento se:up && php bin/magento se:s:d -f && php bin/magento c:f && php bin/magento module:disable Magento_TwoFactorAuthHit the URL http://sonal.magento.com in the browser. This is Magento 2 Home page
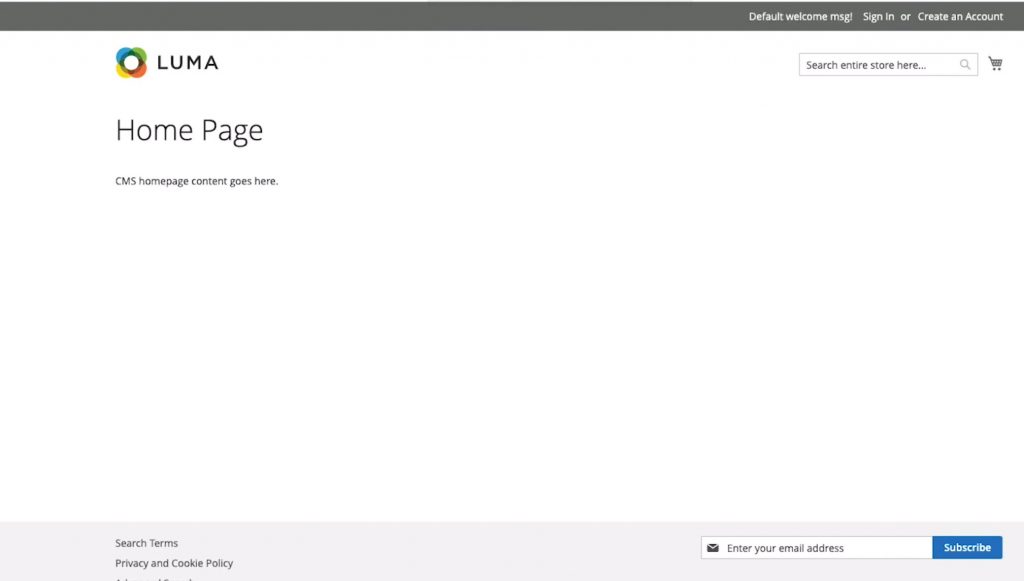
Admin Login
Your Admin Url – http://sonal.magento.com/admin/

Step 7: Install sample data for Magento 2
Now we will deploy sample data for our new Magento 2.4.4 website on localhost. Sample data will fill your website with some products, categories and images so your website will look like this:

To install the sample data, run the below command
php bin/magento sampledata:deploy && php bin/magento indexer:reindex && php bin/magento se:up && php bin/magento se:s:d -f && php bin/magento c:f
Well done! refresh your website and enjoy your new Magento 2.4 installation with sample data

You can watch complete video for this installation of Magento2 on Ubuntu.
Wrapping up
I have tried my best to give you the step-by-step tutorial so that it will be helpful for users who are having trouble installing Magento 2.4. If you face any problems during installation process, please drop a comment below (better with image describing your problem). I will be happy to help!


